Recent Posts
The Homeowner’s Guide to Filing an Insurance Claim for Roof Water Damage
3/11/2025 (Permalink)
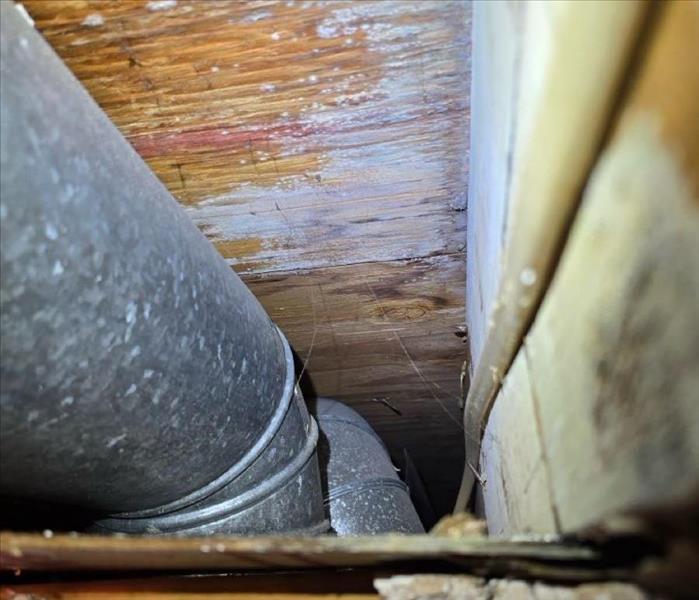 Filing an insurance claim properly can help you get the coverage you need, but the process can be confusing if you don’t know what steps to take.
Discovering a roof leak can be stressful, especially when water damage threatens your home’s structure and personal belongings. Filing an insurance claim properly can help you get the coverage you need, but the process can be confusing if you don’t know what steps to take.
This guide will walk you through the claim process, documentation tips, and common mistakes to avoid to ensure a smoother experience.
Does Homeowners Insurance Cover Roof Leaks?
In 2022, 27.6% of all homeowners insurance claims were related to water damage and freezing. However, not all water damage is covered, so understanding your policy is crucial.
Insurance coverage for roof water damage depends on how the damage occurred. If the leak is sudden and caused by a covered event, your insurance will likely help cover repairs. However, damage from lack of maintenance or gradual wear and tear is often not covered.
What’s Typically Covered?
- Storm damage from hail, wind, or fallen tree branches
- Water damage from heavy rain or wind-driven rain
- Roof leaks caused by sudden, accidental damage
What’s Usually Not Covered?
- Roof damage due to old age or poor maintenance
- Long-term leaks that weren’t reported promptly
- Mold or structural damage that developed over time
Reviewing your insurance policy will help you determine what is and isn’t covered before you file a claim.
How to File an Insurance Claim for Roof Water Damage
Step 1: Document the Damage Immediately
Strong documentation is key to a successful claim. As soon as you notice a leak:
- Take clear photos and videos of roof damage, ceiling stains, water pooling, and any damaged belongings.
- Record key details, including the date, time, and possible cause (e.g., recent storm).
- Gather past inspection reports or maintenance records to prove your roof was in good condition before the incident.
Step 2: Take Immediate Preventative Measures
Insurance companies require homeowners to prevent further damage. If you don’t, they may reduce or deny your claim.
- Cover the leak with a tarp or waterproof material.
- Use fans or dehumidifiers to dry wet areas and prevent mold.
- Keep all repair receipts—your insurer may reimburse these costs.
Step 3: Review Your Homeowners Insurance Policy
Before filing a claim, check your policy details:
- Verify coverage for roof leaks and water damage.
- Check for exclusions that may affect your claim.
- Confirm your deductible to determine if filing a claim is worthwhile.
If you're unsure, contact your insurance agent for clarification.
Step 4: Contact Your Insurance Company
Once you have documentation, report the damage to your insurer. Provide:
- A detailed account of the incident (what happened and when).
- Your photos and damage records to support your claim.
- Ask about the next steps, including claim timelines and required documents.
Your insurer will assign an adjuster to assess the damage. Remember to get a claim number for reference.
Step 5: Work with the Insurance Adjuster
Your adjuster determines how much the insurance will pay for repairs. To ensure a fair assessment:
- Be present during the inspection and point out all damage.
- Provide your documentation, including photos and contractor estimates.
- Negotiate if necessary—you can request a second opinion if the offer seems too low.
Since adjusters work for the insurance company, it's important to advocate for yourself to get a fair settlement.
Common Mistakes That Can Get Your Claim Denied
Many homeowners make simple mistakes that delay or reduce their insurance payout. Here are the most common ones to avoid:
- Waiting too long to file
- Not documenting thoroughly
- Ignoring temporary repairs
- Accepting a low initial offer
- Hiring unlicensed contractors
What to Do If Your Claim Is Denied
If your insurance claim is denied, don’t give up—there are still options:
- Request a written explanation from your insurance provider.
- Review your policy to ensure the denial was justified.
- Get a second opinion from an independent inspector.
- File an appeal and provide additional documentation.
- Consider hiring a public adjuster to negotiate on your behalf.
Denials are not always final, so don’t hesitate to challenge a decision if you believe it is unfair.
Filing an insurance claim for water damage can be a complicated and stressful process, but following the right steps can make a big difference in getting the compensation you need.
If you need help with water damage restoration, mold prevention, or emergency cleanup, SERVPRO of Berlin/Williamstown is here to assist. Contact us today to restore your home and help you navigate the insurance process with confidence!
Preventing Candle Fires in Your Home: Simple Tips to Stay Safe
12/11/2024 (Permalink)
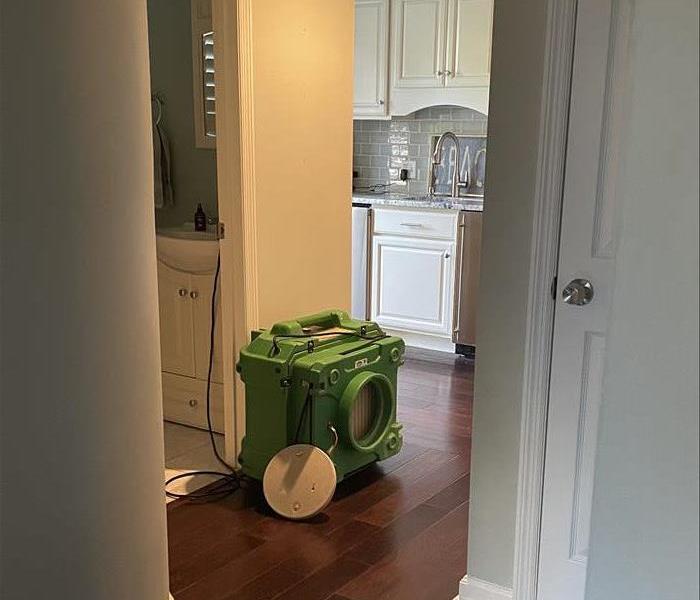 Let’s look at some ways to prevent candle fires and what to do if a candle does start a fire in your home.
Candles add a cozy and relaxing feel to any home, but if not used carefully, they can also be a fire hazard. According to the U.S. Fire Association, candles are responsible for about 20 home fires every day.
Candles are great for setting the mood, but they come with risks. An open flame, even a small one, can quickly spread and cause major damage. Keeping safety in mind when using candles can help you avoid disaster.
Let’s look at some ways to prevent candle fires and what to do if a candle does start a fire in your home.
How to Prevent Candle Fires
- Don’t Leave Candles Unattended
A big mistake people make is leaving candles burning while they leave the room or go to bed. Always blow out the candle if you're leaving the area, even for just a short time. It’s not worth the risk to leave it unattended. - Use Proper Candle Holders
Make sure your candles are placed in sturdy, heat-resistant holders. These should sit on a stable surface where they won’t tip over. Keep candles away from anything that can catch fire like curtains, books, or furniture. - Keep Candles Away from Flammable Items
Candles should be at least 12 inches away from anything that can burn. This includes curtains, bedding, and decorations. Also, avoid placing candles near windows, as a draft could knock them over or blow a flammable object into the flame. - Trim the Wick
Before lighting a candle, trim the wick to about 1/4 inch. A shorter wick keeps the flame smaller and more controlled, reducing the chances of the candle burning unevenly or creating a larger flame. - Use Candles in Well-Ventilated Spaces
Make sure you’re burning candles in a room with good air circulation. This helps keep smoke from building up and reduces the risk of overheating. Also, avoid burning a candle down to the very end; leave about half an inch of wax to prevent overheating. - Try Flameless Candles
If you love the ambiance of candles but want to avoid the risks, flameless LED candles are a great alternative. They look just like real candles but don’t have an open flame, making them safer, especially if you have kids or pets.
What to Do If a Candle Fire Starts
If a candle fire does start, you’ll want to act quickly. Here are the steps you should follow:
- Smother the flames: Use baking soda or a fire extinguisher to put out small fires.
- Evacuate if needed: If the fire spreads, get everyone out of the house and call 911.
- Call for help: After the fire is out, call SERVPRO® for fire damage cleanup and restoration.
SERVPRO Is Here to Help®
If you experience a candle fire in your home, the aftermath can be overwhelming. SERVPRO of Berlin/Williamstown specializes in fire damage restoration and can help you get your home back to normal. We’ll even work with your insurance to make the process as easy as possible.
The Do's and Don'ts of Handling Water-Damaged Electronics
10/9/2024 (Permalink)
Water and electronics are a disastrous combination. Whether it's due to flooding, a burst pipe, or an accidental spill, water can cause significant damage to your electronic devices. However, all hope is not lost if your electronics get wet. By taking the right steps—and avoiding common mistakes—you may be able to salvage your devices. In this blog, we'll explore the do's and don'ts of handling water-damaged electronics to help you minimize damage and increase the chances of recovery.
Do's of Handling Water-Damaged Electronics
Do Disconnect the Power Immediately
If your electronic device is still connected to a power source, unplug it immediately to prevent electrical shock or further damage. If it's a battery-powered device, remove the batteries as quickly as possible.
Do Turn Off the Device
If the device is still on, power it down immediately. Keeping it on can cause short circuits, which can irreparably damage internal components.
Do Remove External Components
Carefully detach any external accessories, such as SIM cards, memory cards, USB drives, and cables. This helps prevent water from spreading to other parts of the device.
Do Use Absorbent Materials
Gently dab the device with a dry, lint-free cloth to remove excess water. For smaller crevices, use a cotton swab or a microfiber cloth. Avoid wiping the device too hard, as this can push water further into the electronics.
Do Use Desiccants
Place the water-damaged device in a container filled with desiccants, such as silica gel packets, which absorb moisture. If silica gel is unavailable, use uncooked rice as a temporary solution. Ensure the device is fully submerged in the desiccant material for at least 24 to 48 hours.
Do Contact a Professional
For valuable or complex electronics, it's wise to consult a professional. SERVPRO®, for example, offers expert restoration services that include the recovery of water-damaged electronics. Their advanced techniques and equipment can significantly improve the chances of salvaging your devices.
Don'ts of Handling Water-Damaged Electronics
Don’t Turn the Device On Immediately
One of the biggest mistakes people make is trying to turn on the device too soon. Turning on a wet device can cause short circuits and permanent damage. Ensure the device is completely dry before attempting to power it on.
Don’t Shake or Blow-Dry the Device
Shaking the device or using a hair dryer to remove water can do more harm than good. Shaking may spread the water to unaffected areas, and heat from a dryer can warp internal components and increase the risk of damage.
Don’t Use Heat Sources to Dry the Device
Avoid placing the device in direct sunlight, on radiators, or in ovens. Excessive heat can damage delicate electronic components and lead to further issues.
Don’t Assume It’s a Lost Cause
Even if the device appears to be severely damaged, don't give up hope. With proper handling and professional intervention, many water-damaged electronics can be recovered. Avoid discarding the device prematurely.
Don’t Skip the Backup
If your device starts working after drying, immediately back up your data. Water damage can cause latent issues that may not manifest until later, so it's important to secure your important files as soon as possible.
Don’t Disassemble the Device Without Expertise
While it might be tempting to open up the device to dry it out, doing so without proper knowledge can lead to more damage. Many modern electronics are complex and require specialized tools and expertise to disassemble safely.
Water-damaged electronics require careful handling to increase the chances of recovery. By following these do's and don'ts, you can minimize the damage and possibly save your device. However, when in doubt, it's best to consult a professional. SERVPRO of Berlin/Williamstown offers specialized water damage restoration services, including the recovery of electronics, to help you get back on track. Remember, quick and appropriate action is key to saving your water-damaged electronics.
Important Mold Prevention Tips for Schools
10/1/2024 (Permalink)
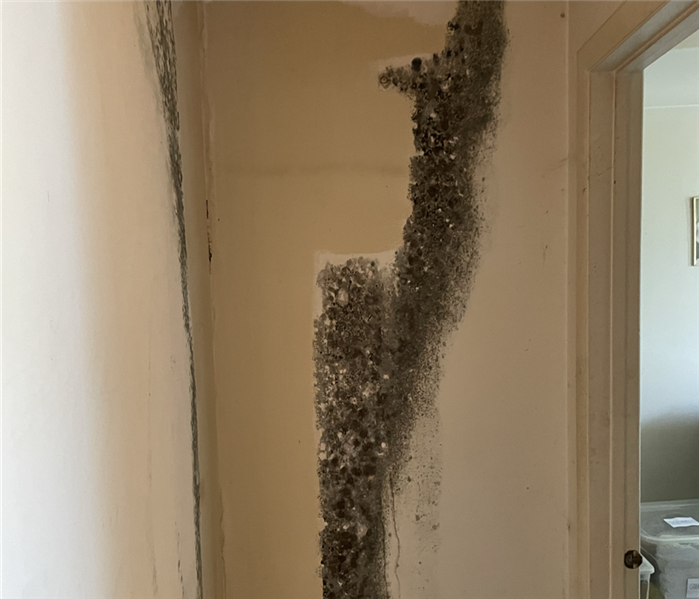 If you need help with mold prevention or remediation in your school, don’t hesitate to reach out.
Mold can be a serious issue in schools, where maintaining a safe environment is essential. It can damage buildings and lead to expensive repairs if not dealt with quickly. At SERVPRO of Berlin/Williamstown, we know how important it is to keep schools and educational facilities free from mold. In this blog, we’ll share the best practices for mold prevention in schools, providing expert advice and practical tips to help protect your facility.
Understanding Mold in Schools
Schools, universities, and daycare centers are especially vulnerable to mold growth because of the many moisture sources, such as bathrooms, kitchens, and HVAC systems. Mold thrives in damp, warm environments and can spread rapidly if not managed. Preventing mold requires a proactive approach, focusing on moisture control and regular upkeep.
According to the Environmental Protection Agency (EPA), up to 50% of schools in the U.S. have reported problems with indoor air quality, and mold is a significant factor. This highlights the need for effective mold prevention strategies to ensure a safe learning environment.
Best Practices for Preventing Mold in Schools
Here are some important steps you can take to prevent mold in schools:
Control Indoor Humidity
Aim to keep humidity levels in classrooms, libraries, and other areas between 30-50%. Use dehumidifiers, especially in damp areas like basements or poorly ventilated rooms.
Maintain HVAC Systems
HVAC systems play a big role in controlling indoor air quality. Make sure to schedule regular inspections and maintenance. Clean air ducts, filters, and coils to prevent moisture buildup that can lead to mold.
Fix Water Leaks Right Away
Even small leaks can cause major mold problems if left unchecked. Regularly inspect the facility for leaks in roofs, windows, and plumbing. Repair any issues immediately to avoid moisture in unwanted places.
Properly Ventilate
Good ventilation is an important step in preventing mold. Install exhaust fans in bathrooms, kitchens, and other high-moisture areas. Make sure vents are clear of blockages and that air is circulating throughout the building.
Monitor Moisture-Prone Areas
Keep an eye on areas prone to moisture, like locker rooms, swimming pools, and spaces near water fountains. Regularly check these areas for signs of mold.
Implement a Regular Inspection Schedule
Create and stick to a routine inspection schedule that includes checking for mold, water damage, and excess moisture. Catching issues early is crucial for preventing mold from spreading.
Educate Staff and Students
Teach staff and students about the importance of mold prevention. Encourage them to report any leaks, water damage, or mold sightings immediately. This proactive approach can help stop mold from becoming a bigger problem.
Keeping Mold Out of Schools
Preventing mold in schools is key to maintaining a safe and productive learning environment. By following these best practices, you can significantly reduce the risk of mold growth and protect your facility from expensive damage. At SERVPRO of Berlin/Williamstown, we have the expertise and experience to assist with all your mold prevention and remediation needs.
If you need help with mold prevention or remediation in your school, don’t hesitate to reach out. Our team of professionals is ready to help you keep your school safe and mold-free.
Tips for Evacuating with Pets During a Storm
9/16/2024 (Permalink)
When a storm or natural disaster hits, being prepared can make all the difference for you and your pets. For those of us living in Berlin, NJ, we know severe weather can strike at any time, so having a plan in place is essential. Evacuating with pets adds another layer of complexity, but with the right preparation, you can ensure their safety and comfort. Here’s what you need to know about evacuating with pets.
Have a Plan in Place
Create an Evacuation Plan
The first step is to have a clear evacuation plan. Know where you will go and how you will get there. Identify pet-friendly shelters, hotels, or friends and family members who can take you and your pets in. The Humane Society of the United States suggests checking with local animal shelters and emergency management offices to find out which facilities accommodate pets.
Identify Pet-Friendly Shelters
Not all emergency shelters allow pets, so it’s crucial to identify pet-friendly options in advance. Websites like BringFido and Pet-Friendly Hotels can help you find accommodations that welcome pets. The American Red Cross also provides resources to locate pet-friendly shelters during emergencies.
Prepare a Pet Emergency Kit
Just like you prepare an emergency kit for yourself, you should have one ready for your pets. Your pet emergency kit should include:
- Food and Water: At least three days’ worth of food and bottled water.
- Medications: Any medications your pet needs, along with instructions for administering them.
- Identification: Copies of your pet’s vaccination records, microchip information, and a current photo.
- Comfort Items: Blankets, toys, and bedding to keep your pet comfortable.
- Sanitation Supplies: Waste bags, litter, and a small litter box for cats.
- Leashes and Carriers: Sturdy leashes, harnesses, and carriers to transport your pets safely.
Practice Makes Perfect
Familiarize Your Pet with Travel
If your pet isn’t used to traveling, start getting them accustomed to it now. Practice trips in the car can help reduce stress during an actual evacuation. Make sure your pet is comfortable in their carrier or crate.
Conduct Drills
Conducting evacuation drills can help you and your pets become familiar with the process. Practice loading your pets into the car, securing their carriers, and driving to a safe location. This will help you identify any potential issues and ensure everyone knows what to do.
Stay Calm and Reassure Your Pets
Pets can sense stress and anxiety, so staying calm is important. Speak to them in a soothing voice and try to keep their routine as normal as possible. Bring familiar items like their favorite toys or bedding to help reduce their anxiety.
Keep a close eye on your pets during the evacuation. Make sure they are secure in their carriers or on a leash at all times. Pets can become disoriented and frightened during an evacuation, so maintaining control is crucial.
Be Prepared and Stay Safe
Evacuating with pets requires extra preparation, but it’s important for their safety and well-being. By having a clear plan, preparing a pet emergency kit, and practicing your evacuation process, you can ensure that you and your pets are ready for any emergency. If you need assistance with storm damage restoration or have questions about emergency preparedness, contact SERVPRO of Berlin/Williamstown. Our team is here to help you stay safe and prepared.
Safe and Proper Ash Disposal from Fireplaces and Wood Stoves
8/14/2024 (Permalink)
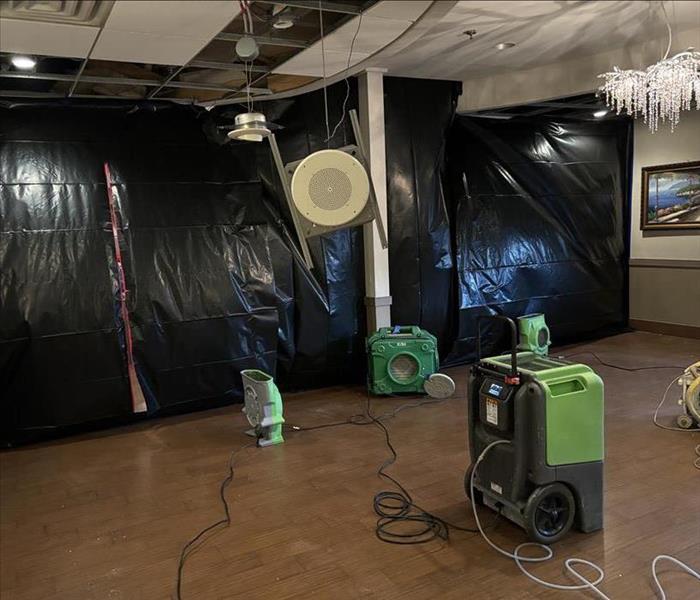 If you need assistance with fire damage restoration, contact SERVPRO of Berlin/Williamstown today!
Using fireplaces and wood stoves can create a cozy atmosphere, but they also produce ashes that need to be disposed of safely. Improper ash disposal can lead to fire hazards and environmental issues. Here’s how to properly handle and dispose of ashes from your fireplace or wood stove.
Steps for Safe Ash Disposal
1. Let Ashes Cool Completely:
Before you start the disposal process, ensure that the ashes have completely cooled. Hot ashes can remain dangerous for several days. Wait at least 24 hours after the last fire before attempting to handle the ashes.
2. Use the Right Tools:
Always use a metal shovel and a metal container with a tight-fitting lid for ash removal. Avoid using plastic or cardboard containers, as these can easily catch fire if any hot embers are present.
3. Transfer Ashes Carefully:
When transferring ashes from the fireplace or wood stove to the metal container, do so slowly and carefully to avoid stirring up dust. Ensure the container is placed on a non-combustible surface, like concrete or stone, away from any flammable materials.
4. Store Ashes Safely:
Once the ashes are in the metal container, place the container outside and away from your home, garage, or any combustible materials. Keep it in a designated area where it won’t be disturbed by wind or animals.
5. Confirm Ashes Are Fully Cooled:
Allow the ashes to sit in the metal container for several days to ensure all embers are fully extinguished. Stir the ashes occasionally to help them cool down more quickly and evenly.
Environmentally Friendly Disposal Options
1. Use Ashes in Your Garden:
Wood ashes can be beneficial for your garden, providing nutrients like calcium and potassium. They can be used to raise the pH level of acidic soil. However, use them sparingly and avoid using ashes from treated wood or wood with chemicals.
2. Composting:
Ashes can be added to your compost pile in small amounts. They help neutralize acidity in the compost and add valuable minerals. Mix them thoroughly to ensure they integrate well with the other compost materials.
3. Ice and Snow Melt:
In winter, ashes can be spread on icy walkways and driveways as a natural and environmentally friendly way to provide traction and melt ice.
What Not to Do
1. Avoid Using a Vacuum Cleaner:
Never use a regular household vacuum cleaner to clean up ashes. Even if the ashes seem cool, there might be hot embers that can ignite a fire inside the vacuum.
2. Don’t Dump Ashes Directly Outdoors:
Avoid dumping ashes directly into the garden, lawn, or trash cans without proper cooling. Hot embers can ignite grass, leaves, or trash, leading to a potential fire hazard.
3. Do Not Use Ashes from Treated Wood:
Ashes from treated or painted wood should never be used in gardens or compost, as they may contain harmful chemicals that can damage plants and soil.
Proper disposal of ashes from fireplaces and wood stoves is essential for fire safety and environmental protection. By following these steps, you can safely manage ash disposal and even find beneficial uses for cooled ashes. Always prioritize safety and handle ashes with care to prevent potential hazards.
For more tips on fire safety and maintaining your home, or if you need assistance with fire damage restoration, contact SERVPRO of Berlin/Williamstown. Our team is here to help you keep your home safe and secure.
Mold and Insurance Claims: What You Need to Know
7/18/2024 (Permalink)
Dealing with mold in your home can be a stressful and costly experience. From property damage to remediation expenses, addressing mold-related issues can quickly add up. Understanding how mold-related damage is covered by insurance can provide clarity and peace of mind during this challenging time. In this blog, we'll explore what you need to know about mold and insurance claims.
Mold Coverage in Insurance Policies
Mold coverage varies among insurance policies and may depend on factors such as the cause of the mold, the extent of the damage, and the specific terms of the policy. Here's what you should know about mold coverage in insurance policies:
- Standard Homeowners Insurance: Most standard homeowners insurance policies provide coverage for sudden and accidental water damage, such as burst pipes or plumbing leaks. However, coverage for mold damage resulting from water intrusion may be limited or excluded, depending on the policy terms.
- Flood Insurance: Flood insurance typically covers water damage caused by natural disasters such as floods or storms. While flood insurance may cover mold damage resulting from covered water intrusion events, it's essential to review your policy to understand the extent of coverage.
- Additional Endorsements: Some insurance companies offer additional endorsements or riders that provide coverage for mold-related damage. These endorsements may be available as optional add-ons to your policy, providing enhanced protection against mold-related losses.
Filing an Insurance Claim for Mold Damage
If you discover mold in your home and believe it may be covered by your insurance policy, follow these steps to file a successful insurance claim:
- Document the Damage: Take photos and videos of the mold growth and any related damage to your property. Document the extent of the mold growth, affected areas, and any visible signs of water damage.
- Review Your Policy: Carefully review your insurance policy to understand the coverage limits, exclusions, and deductible requirements related to mold damage. Contact your insurance provider if you have any questions or need clarification about your coverage.
- Notify Your Insurance Company: Contact your insurance company as soon as possible to report the mold damage and initiate the claims process. Provide detailed information about the cause of the mold, the extent of the damage, and any mitigation efforts you've taken.
- Cooperate with the Claims Adjuster: Your insurance company may assign a claims adjuster to assess the mold damage and determine the coverage eligibility. Cooperate with the claims adjuster and provide any requested documentation or evidence to support your claim.
- Mitigate Further Damage: Take steps to mitigate further mold damage to your property while waiting for the insurance claim to be processed. This may include removing water-damaged materials, drying out affected areas, and preventing moisture buildup.
- Document Expenses: Keep detailed records of any expenses related to mold remediation, repairs, and temporary accommodations. This information will be essential for substantiating your claim and seeking reimbursement from your insurance company.
Navigating insurance claims for mold damage can be complex, but understanding your coverage and following the proper procedures can help streamline the process. By reviewing your policy, documenting the damage, and cooperating with your insurance company, you can increase the likelihood of a successful insurance claim for mold-related damage. Remember to keep thorough records of expenses and communicate openly with your insurance provider throughout the claims process. With proper preparation and diligence, you can protect your interests and secure the coverage you need to address mold-related issues in your home.
What to Expect During a Water Damage Inspection
6/12/2024 (Permalink)
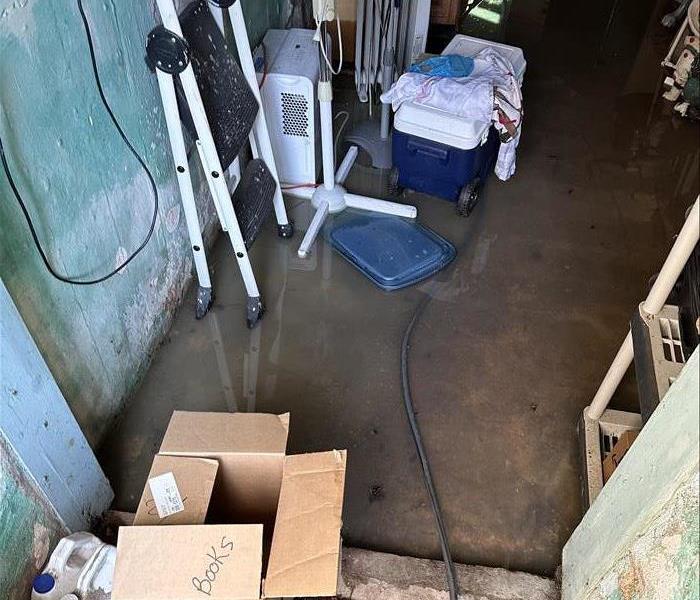 If you're faced with water damage, don't hesitate to contact SERVPRO for a comprehensive inspection and restoration services.
Welcome to another informative blog post from SERVPRO®! Today, we're diving into the critical process of water damage inspection. Whether you're a homeowner or a business owner, encountering water damage can be stressful and overwhelming. However, understanding what to expect during a water damage inspection can help alleviate some of that stress and ensure a smoother restoration process.
When you contact SERVPRO for a water damage inspection, here's what you can anticipate:
- Prompt Response: Our team understands the urgency of water damage situations. Expect a prompt response and swift arrival at your property to assess the damage.
- Thorough Assessment: Our certified technicians will conduct a thorough inspection of the affected areas. This includes identifying the source of the water intrusion, assessing the extent of the damage, and documenting their findings.
- Moisture Detection: Water can seep into hidden areas, leading to potential mold growth and structural damage. Our technicians utilize advanced moisture detection equipment to identify moisture levels in walls, floors, and other structural components.
- Damage Documentation: During the inspection, our team will document all visible damage. This documentation is crucial for insurance claims and ensures transparency throughout the restoration process.
- Identification of Salvageable Items: Not all items may be beyond repair. Our technicians will assess which items can be salvaged and which ones require replacement. Salvageable items will be carefully cleaned and restored.
- Customized Restoration Plan: Based on the inspection findings, we'll develop a customized restoration plan tailored to your specific needs. This plan outlines the steps required to restore your property to its pre-damage condition.
- Clear Communication: Throughout the inspection process, our team will communicate openly with you, addressing any concerns or questions you may have. We believe in transparency and keeping our clients informed every step of the way.
- Professional Recommendations: After completing the inspection, our technicians will provide professional recommendations for the restoration process. This may include drying techniques, structural repairs, and preventative measures to avoid future water damage issues.
At SERVPRO, we understand the importance of a thorough water damage inspection. Our goal is to provide reliable, efficient, and transparent service to our clients, helping them navigate through challenging situations with ease.
If you're faced with water damage, don't hesitate to contact SERVPRO for a comprehensive inspection and restoration services. With our expertise and commitment to excellence, we'll help you restore your property and peace of mind. Stay tuned for more informative blogs from SERVPRO!
Storm-Proofing Your Northeastern Vacation Home: Top Strategies
5/15/2024 (Permalink)
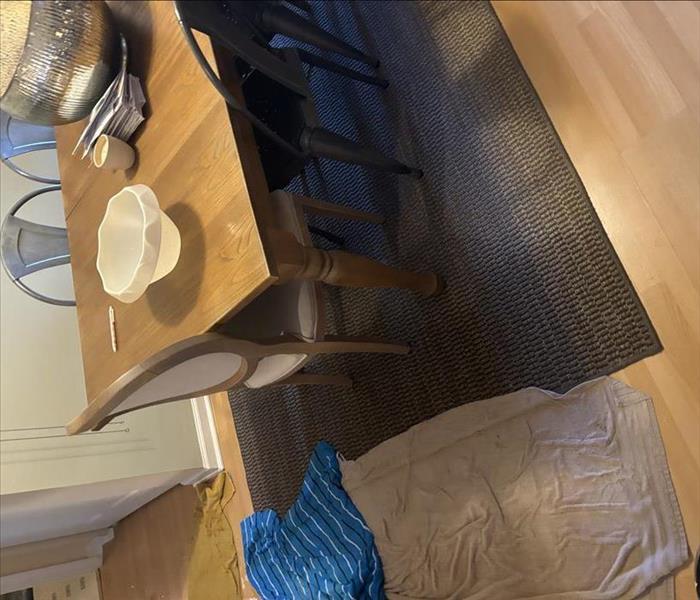 Remember, preparation is the key to weathering any storm that comes your way.
As we gear up for another season of unpredictable weather in the Northeast, it's crucial to ensure that your vacation home is prepared to weather the storms, literally. In this blog post, we'll explore the top strategies for storm-proofing your cherished retreat, providing you with peace of mind and a home that stands strong against the elements.
Thorough Inspection and Maintenance
Before the storm clouds gather, conduct a comprehensive inspection of your vacation home. Look for any weak spots in the roof, windows, and doors. Address any existing damage promptly and perform routine maintenance, such as cleaning gutters and trimming overhanging branches. A sturdy foundation is the first line of defense against the forces of nature.
Fortify Windows and Doors
Invest in impact-resistant windows and doors to safeguard against strong winds and flying debris. Installing storm shutters is another effective measure. These reinforcements not only protect your property but also enhance its overall security, making it a win-win solution.
Landscaping for Storm Resistance
Strategically landscaping your property can minimize potential storm damage. Plant wind-resistant trees and shrubs, and ensure they are properly pruned. Remove any dead or weak branches that could become projectiles in high winds. Proper landscaping not only adds beauty to your vacation home but also serves as a barrier against the destructive forces of a storm.
Secure Outdoor Furniture and Equipment
Don't underestimate the power of loose outdoor items during a storm. Secure patio furniture, grills, and any other outdoor equipment to prevent them from becoming projectiles. Stow away lightweight items in a secure location, minimizing the risk of damage to your property and neighboring homes.
Backup Power and Emergency Kits
Ensure your vacation home is equipped with a reliable backup power source, such as a generator, to keep essential systems running during power outages. Prepare emergency kits with essentials like non-perishable food, water, first aid supplies, and important documents. Having these essentials on hand can make a significant difference in the aftermath of a storm.
By implementing these storm-proofing strategies, you'll not only protect your Northeastern vacation home but also enhance its resilience for years to come. Remember, preparation is the key to weathering any storm that comes your way. Stay safe, stay secure, and let SERVPRO® be your trusted partner in disaster recovery.
The importance of roof fireproofing
4/19/2024 (Permalink)
 SERVPRO of Berlin/Williamstown is here to support you in protecting your home and assisting you with fire-related cleanup and restoration needs.
As a homeowner, ensuring the safety of your property should be a top priority. While many safety measures are taken inside the home, it's crucial not to overlook the importance of protecting your property from external threats, such as fires. One often underestimated but highly effective method is roof fireproofing.
Your roof is not only an integral part of your home's structural integrity, but it plays a vital role in safeguarding your property against various hazards, including fires. In this blog post, we'll delve into the reasons why roof fireproofing is essential and how SERVPRO® can help you fortify your home against potential disasters.
Preventing the Spread of Fire
Roof fires can quickly escalate and spread, causing extensive damage to your property. By investing in roof fireproofing measures, you create a barrier that can significantly slow down the progression of flames. This crucial time can be the difference between a manageable incident and a devastating disaster.
Enhancing Structural Integrity
A fire-damaged roof can compromise the structural integrity of your entire home. Fireproofing materials not only resist combustion but also strengthen the overall structure. SERVPRO offers advanced fire-resistant coatings and materials that add an extra layer of protection to your roof, ensuring it remains resilient in the face of potential threats.
Insurance Premiums and Property Value
Homes equipped with fire-resistant features, including roof fireproofing, often qualify for lower insurance premiums. Insurance providers recognize the reduced risk associated with fireproofed properties, leading to cost savings for homeowners. Additionally, fireproofing contributes to the overall value of your property, making it a wise investment for both safety and financial reasons.
Peace of Mind
Knowing that your home is fortified against the devastating effects of fires provides invaluable peace of mind. In the event of a fire, you can rest assured that your roof has an added layer of defense, giving you more time to evacuate and minimizing potential losses.
Why Choose SERVPRO for Roof Fireproofing
SERVPRO is a trusted leader in disaster recovery and restoration. Our team of experts is equipped with the latest technology and knowledge to assess your property's unique needs and provide tailored solutions. From fire-resistant coatings to advanced roofing materials, we offer a comprehensive range of services to ensure your home is well-protected.
Roof fireproofing is a proactive and effective measure to safeguard your home, family, and belongings from the destructive impact of fires. With SERVPRO as your partner in home protection, you can take confident steps toward fortifying your property and enjoying the peace of mind that comes with knowing you're prepared for the unexpected.
 Filing an insurance claim properly can help you get the coverage you need, but the process can be confusing if you don’t know what steps to take.


 24/7 Emergency Service


